Showing posts with label blogger template. Show all posts

Sunday, February 22, 2015

How to Boost your site SEO with videos

Most of the Blogger wants boost their SEO (search engine Optimization) their blog or site. But they actually didn't think that what makes a reader or audiences interesting and to make them to stay long. But today i am going to tell, how can a blogger can boost their sites with related videos?

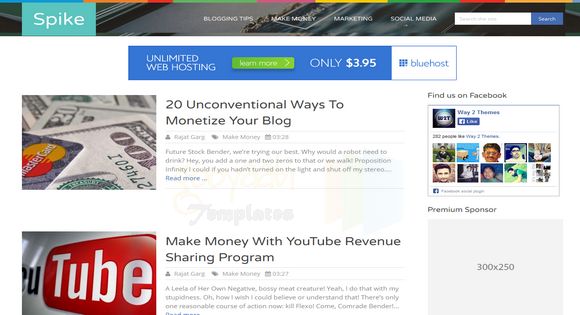
Most of the audiences enjoys watching videos instead of reading every single word written in an article. if you can post related videos, They feel interested knowing something by watching related videos with content, which makes your audiences to stay or spend long period on your blog. Not more things need to explain below picture says everything.

Read More »

Saturday, August 23, 2014

Spike Responsive Blogger template


                                LIVE DEMO                                                           DOWNLOAD


 Template Features:
Blogger, Email Subscription Widget Ready, Unique, Seo Ready, Black, 4 Columns Footer, Responsive, Magazine, Page Navigation Menu, Gray, Clean, Simple, White, Ads Ready, Post Thumbnails, Drop down Menu, 1 Right Sidebar, 2 Columns, 1 Sidebar, Right Sidebar.
Read More »

Friday, August 22, 2014

Rocket blogger template

Rocket Template

  • Template Name :- Rocket Blogger Template.
  • Author :- Sorat Templates.
  • Designer :-Kopasoft.
  • Release Date :- April 2013.
  • Features :- 3 Columns, Magazine, Featured Content Slider, Fixed Width, Dropdown Menu, Social Widget, Gray Background, Page Navigation Widget.
It is little bit of modified version of Rocket Blogger template with sticky navbar.


Configure Dropdown menu:-

  • Go to Blogger dashboard >> Template >> Edit HTML. Now scroll down following code and replace it with your links.

<nav class='main-nav'>
 <span class='menu-icon'>Menu</span>
 <ul id='main-menu'>
   <li class='current-menu-item'><a href='/'>    Home</a></li>
 <li><a href='/search/label/Tricks'>Tricks</a>
 <ul>
 <li><a href='/search/label/Android'>Android</a></li>
 <li><a href='/search/label/Internet'>Internet</a></li>
 <li><a href='/search/label/Computer'>Windows</a></li>
 <li><a href='#'>Element page</a></li>
 <li><a href='#'>Typography page</a></li>
 <li><a href='#'>404 page</a></li>
 <li><a href='#'>Contact page</a></li>
 </ul>
 </li>
 <li><a href=''>Programming</a>
 <ul>
 <li><a href='/search/label/C'>C Coding</a></li>
 <li><a href='/search/label/C%20Plus%20Plus'>C++ Coding</a></li>
 <li><a href='#'>Visual Basic</a></li>
 <li><a href='#'>Element page</a></li>
 <li><a href='#'>Typography page</a></li>
 <li><a href='#'>404 page</a></li>
 <li><a href='#'>Contact page</a></li>
 </ul>
 </li>
 <li><a href='/search/label/blogging%20tips'>Blogging Tips</a></li>
 <li><a href='/search/label/NepaliBand'>Nepali Music</a></li>
 <li><a href='/search/label/Earn%20money'>Earning Tips</a></li>
 <li><a href='#'>Blogger Template</a></li>
   <li><a href='/p/about-me.html'>About</a></li>
 <li><a href='/p/contact-form-contact-us-to-contact-us.html'>Contact</a></li>
   <li><a href='/p/forum.html'>Discuss</a></li>
 </ul>
 <div class='divider-menu'><span/></div>
</nav>
<div class='clear'/>
</div>
</div>


Read More »

Saturday, May 17, 2014

How to create a table in Blogger or anyother plartform easily using microsoft office

Rather than listing in a point, It will be better, if we use for listing, showing some important information through table. 

But What if, we are using blogger or wordpress or anything website designing platform and we are also a beginner of that platform. It will be difficult to create a table using Html, php or any other code.

Today I am sharing with you all, How can we create a table in blogger or any other platform easily? Yes we can easily create a table using microsoft office package like word, excel etc. 


Lets create a table easily

  • First open Microsoft word or Excel.
  • Now create a table and fill up it with necessary content.
  • Now Select the table and copy as shown in the picture below.


  •  And paste it to the blogger or any other platform.
You can also copy the excel content with table with same process.

Finally you will get table like this.

Name
Binaya Gurung
Address
Nepal
Read More »

Wednesday, May 14, 2014

How To Add Customize Scroll Bar in Your Blogger Blog (Blogspot widget)


Nowadays Blogger blog (or blogspot) is the most popular blog designing platform provided by Blogger. Most of the blogger begins with the blogger blog for sharing and for many purpose by posting into their blog.

And all of us blogger wants to decorate our blog very beautifully, so visitors and people can be attracted. Many bloggers have seen many customized scroll bar in popular blog and wants to customize their blog with beautiful scrollbar,but dont know how to do? 

So, Today i am here to share Customizable Scrollbar script for the blogger. Hope this tip or customizable scrollbar you will like, And it is very quick and easy to customize the colors, size (width and height). This can be done by adding script (Which is given at the middle of the post) into the CSS code. 

Lets customize the Scroll bar.

  • First Go to Blogger Dashboard.
  • Now click on template >> Edit HTML.
  • Now search for this code ]]></b:skin> using ctrl+f button.
  • Now Copy the Below code and just paste above ]]></b:skin> .

/* startingphaseofc.blogspot.com scrollbar effect */ ::-webkit-scrollbar { width:8px; height:6px; } ::-webkit-scrollbar-track { -webkit-box-shadow: inset 0 0 4px rgba(0,0,0,0.3); background:#eee; } ::-webkit-scrollbar-thumb { background: rgba(28,119,229,0.7); -webkit-box-shadow: inset 0 0 6px rgba(0,0,0,0.5); } ::-webkit-scrollbar-thumb:window-inactive { background: rgba(116,188,99,0.5);

  • Now click on save template and its done.

OR you also can do this with following method.

  • First go to Blogger dashboard.
  • And click on Template >> Customize button.
  • Now click on Advance >> Add CSS and you will see 'Add custom CSS' and box now just paste above code.
  • Now click on Apply to Blog Button and its done.

NOTE:

You can change the color by changing #eee and width and height by changing width:8px; height:6px; with your desired size.


Read More »

Saturday, April 5, 2014

How to move post title before blog name


  • Go to Blogger Dashboard >> Template >> Edit HTML.
  • Now search for this code
<title><data:blog.pageTitle/></title>

  • Now replace <title><data:blog.pageTitle/></title> code with following code.
          <b:if cond='data:blog.pageType == "item"'>
<title><data:blog.pageName/> |<data:blog.title/></title>
<b:else/>
<title><data:blog.pageTitle/></title> </b:if>
  • Now save the template and you are done! 
Read More »

Sunday, March 23, 2014

How to remove showing posts with label on blogger


  • Go to Blogger Template >> Edit HTML and Search for the below code
<b:includable id='status-message'>
  • Now Expand the code and replace with the below code.
<b:includable id='status-message'>
<b:if cond='data:navMessage'>
<div>
</div>
<div style='clear: both;'/>
</b:if>
</b:includable>

  • And save it.
Read More »

How to remove subscribe to post atom

  • Go to Blogger Template >>Edit HTML and press ctrl+F and serach for this code 
<b:include data='feedLinks' name='feedLinksBody'/>
  • Now remove the above code and save it
Read More »

How to add Read more Post on Blogger


  • Go to Blooger Template >> Edit Html and Press ctrl+f and type this code <data:post.body/> and hit enter twice and replace this with below code.

<b:if cond='data:blog.pageType != &quot;item&quot;'>
<b:if cond='data:blog.pageType != &quot;static_page&quot;'>
<div expr:id='&quot;summary&quot; + data:post.id'><data:post.body/></div>
  <script type='text/javascript'>createSummaryAndThumb(&quot;summary<data:post.id/>&quot;);</script>
<span class='readmore' style='float:right'><a expr:href='data:post.url'>Read More &#187;</a></span></b:if></b:if>
<b:if cond='data:blog.pageType == &quot;item&quot;'><data:post.body/></b:if>
<b:if cond='data:blog.pageType == &quot;static_page&quot;'><data:post.body/></b:if>

  • Now search for </head> and just above </head> Paste the below code.
<script type='text/javascript'>
posts_no_thumb_sum = 490;
posts_thumb_sum = 400;
img_thumb_height = 120;
img_thumb_width = 120;
</script>
<script type='text/javascript'>
//<![CDATA[
function removeHtmlTag(strx,chop){
if(strx.indexOf("<")!=-1)
{
var s = strx.split("<");
for(var i=0;i<s.length;i++){
if(s[i].indexOf(">")!=-1){
s[i] = s[i].substring(s[i].indexOf(">")+1,s[i].length);
}
}
strx = s.join("");
}
chop = (chop < strx.length-1) ? chop : strx.length-2;
while(strx.charAt(chop-1)!=' ' && strx.indexOf(' ',chop)!=-1) chop++;
strx = strx.substring(0,chop-1);
return strx+'...';
}
function createSummaryAndThumb(pID){
var div = document.getElementById(pID);
var imgtag = "";
var img = div.getElementsByTagName("img");
var summ = posts_no_thumb_sum;
if(img.length>=1) {
imgtag = '<span class="posts-thumb" style="float:left; margin-right: 5px;"><img src="'+img[0].src+'" width="'+img_thumb_width+'px" height="'+img_thumb_height+'px"/></span>';
summ = posts_thumb_sum;
}
var summary = imgtag + '<div>' + removeHtmlTag(div.innerHTML,summ) + '</div>';
div.innerHTML = summary;
}
//]]>
</script>
  • And save it.

Read More »

Saturday, March 22, 2014

How to remove older/newer/home link from Blog


  1. How to remove Newer posts link ?
  • Go to Template << Edit HTML << and search for following code.
#blog-pager-newer-link{background:
  • Now just copy the below code and paste after/below the #222;float:left;padding:4px} .
#blog-pager-newer-link {display:none;}
And save it.
     2. How to remove Older posts link ?
  • Search for following code.
#blog-pager-older-link{background:
  • Now just copy the below code and paste after/beow the code #222;float:right;padding:4px}
#blog-pager-older-link {display:none;}
And save it.
      3.How to remove Home link ?

  •  search for following code.

.home-link {background:
  • Now just copy the below code and paste after/below the #222;float:left;padding:4px} code.
#blog-pager .home-link {display:none;}

And Save it.
Read More »

How to change font size of posts on blogger


  • Go to Template >> Edit HTML >> and search for ".post-body{" (without quot).
  • then you will see following code.

.post-body{margin:0px;padding:0px 16px 0px 0px;font-family:Arial, Helvetica, Sans-serif;font-size:15px;line-height: 20px;}
  • Now change 15 to your desired size.
Read More »

Thursday, March 20, 2014

How to remove Navbar from blog

This is the tutorial of removing Navbar/Navigation from blog.

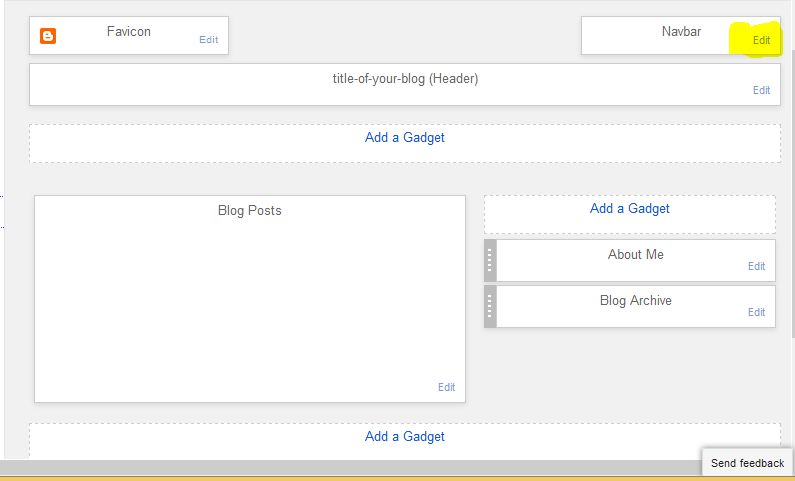
  • Go to Blogger Layout 
 click Edit on 'Navbar' 


New window will open then choose OFF option from the list and click on save.


ENJOY   !!!!!!!!!!!!!!!!!!!!!!!!!!!!!!!!!!!
Read More »

How to create the labels on post

  • Create a new post.


  • Now click on labels on the right side.


Now type a labels . labels should be separated with commas.Then click done and publish the post.

   ENJOY  !!!!!!!!!!!!!!!!!!!!!!!!!!!
Read More »

How to add html / java script on blogger

1. Log into your Blogger account. 

2. Once logged in you will need to click on "Layout"

3. Next you will need to decide where you would like to run Chitika ads on your Blogger site.

4. When you have the desired location you will need to click on "Add a Gadget"

5. You will then need to click on HTML/JavaScript to add JavaScript code to your site. 


6. This will bring up a new window that you can copy and paste the ad code you have generated from the publisher panel into the "Content section." Once you have the code in this window you will need to click save.


7. Next you will need to click "Save Arrangement" and you are done.


Enjoy!!!!!!!!!!!!!!!!!!
Read More »

How to create a Blog with Blogger

You must have gmail account for creating a blog with blogger. Don't have a gmail account ? create NOW
After creating Gmail account go to Blogger.com

Enter your gmail ID and password on required field. eg.
and click on sign in button.

Now click on 'New Blog' and choose title of your blog and address of your blog.


choose a template and click on 'create blog!'.


Now your blog has been successfully created. Enjoy!!!!!
Read More »