Showing posts with label Blogger. Show all posts

Wednesday, January 6, 2016

How to Add Meta Keywords to Each Blogger Post


Adding Meta Keywords to your any Blogger post Article and Blogs makes your sites visible to Search Engines with many related keywords.

Adding any related Meta Keyword to your blogger post plays the significant role to improve the Site SEO and Ranking.

This tip does not make you to edit html and you also not to be so expert on HTML.

How to Add Meta Keywords to Blogger Post:

1. First Create any New Post or edit an existing post.

2. Now click on HTML tab on Editing Post.

3. Now add the following code at anywhere of page.
<meta content='Related keyword separated with commas.' name='keywords'/>
4. Now replace Related keyword separated with commas. with related keywords to your post.

5. Now publish the Post and you have successfully added meta keywords to your blogger post.

Read More »

Monday, November 16, 2015

How To Add Code Box In Blogger Blog

Hello readers,it's me new author of this blog and this is my first post in this blog, In this post i will show you How To Add Code Box Area in Blogger Posts.well,People want to add the HTML code in blogger in different box so that one can easily locate the html code in the post and also easily copy and paste the code to us it.

See the step by step guide to enable this function in your blog for each post.

Step1: Log in to your blogger Dashboard >>> Template >>

Step2: Then Click on the Customize

Step3: Now a window will open their click on Advanced >>> then >>> Add CSS

Step4: After this a box will open. Add the following code in the box and click on apply to blog button to enable this in to your blog.
.code { background:#f5f8fa; background-repeat:no-repeat; border: solid #5C7B90; border-width: 1px 1px 1px 20px; color: #000000; font: 13px 'Courier New', Courier, monospace; line-height: 16px; margin: 10px 0 10px 10px; max-height: 200px; min-height: 16px; overflow: auto; padding: 28px 10px 10px; width: 90%; } .code:hover { background-repeat:no-repeat; }
Step5: Now in order to apply this to blogger post, when you're composing your post goes to HTML and then put code between the following tags.
<div class="code">Paste your code</div>
Now, Paste your code In the place "Paste your code"

Now,You Have Successful Install This Code Box In Your Blog.If You have any problem Leave your comment Or Just send me your problem At "bishalcreations@gmail.com" And Follow Us By Email To Get Update on your email When We Add new post in our blog,Like our Facebook Page,Circle Us On Google And Follow us On Twitter.

About The Author 'Bishal Bhandari'

 I’m Bishal Bhandari From Nepal And I Manage Bishal Creations And All Rounder Tricks.I’m Not A Professional Blogger By Education I’m Self Trained Guy And I Am 16 Years Old.Well Talking About Me I’m A Normal Guy Who Lives The Life Fullest, Loves Searching New Things On Internet, Loves Visiting New Places And I Like To Make New Friends From Around The World And Love To Share My Knowledge.

Check My Blogs
All Rounder Tricks
Bishal Creations

Happy Blogging!!!!
Regards,Bishal Bhandari

Read More »

Saturday, September 5, 2015

How to Add an Alexa Ranking Widget in website or Blog?

Alexa Ranking is only one factor now, That decides the how popular your blog or website is.

So why is Alexa rank important? Alexa is a competitive intelligence tool that is used to measure and compare your website with competitors and shows the global traffic rank for a website. The ranking number helps advertisers to analyze the marketing capacity of your website. If you have a good ranking in Alexa then these advertisers will be ready to buy an ad space on your website for a really high price.
Alexa Ranking Widget
To Increase Alexa Raking of your websites there are Different Ways, One of those way is to embed the alexa Ranking button to the blog and websites.

1. How to Add an Alexa Ranking to the Blog or Websites?

Here I have listed HTML code which you need to add to your websites or blog. There are three different sizes.

Alexa Site Status Button
It shows your website rank with total number of links.

120 X 95
<a href="http://www.alexa.com/siteinfo/askmebyte.com"><script type="text/javascript" src="http://xslt.alexa.com/site_stats/js/s/a?url=askmebyte.com"></script></a>
120 X 240 
<a href="http://www.alexa.com/siteinfo/askmebyte.com"><script type="text/javascript" src="http://xslt.alexa.com/site_stats/js/s/b?url=askmebyte.com"></script></a>
468 X 60
<a href="http://www.alexa.com/siteinfo/askmebyte.com"><script type="text/javascript" src="http://xslt.alexa.com/site_stats/js/s/c?url=askmebyte.com"></script></a>


Alexa Site Ranking Button
It shows your website rank.

120 X 65
<a href="http://www.alexa.com/siteinfo/askmebyte.com"><script type="text/javascript" src="http://xslt.alexa.com/site_stats/js/t/a?url=askmebyte.com"></script></a>
120 X 90 
<a href="http://www.alexa.com/siteinfo/askmebyte.com"><script type="text/javascript" src="http://xslt.alexa.com/site_stats/js/t/b?url=askmebyte.com"></script></a>
468 X 60
<a href="http://www.alexa.com/siteinfo/askmebyte.com"><script type="text/javascript" src="http://xslt.alexa.com/site_stats/js/t/c?url=askmebyte.com"></script></a>

Now you have to replace askmebyte.com with your website name and its done!!!!

Read More »

Tuesday, May 19, 2015

Blogger or Wordpress - Which One Should you Use?

You are here, That means you are definitely a blogger, Then you probably may be familiar with these two words: Blogger and Wordpress. Both Are the Top and established Blogging platform. And you probably may be here because you are confused to choose the blogging platform between Blogger and Wordpress.

Today I am here to Share my experience of Using both Wordpress and Blogger and comparison between them as per my experience.


I started my blogging career with Blogger So As of Now, I am too much familiar with Blogger Blogging Platform, And it is also almost a 4 years of using Wordpress Platform for publishing my contents. So here is my Experience of Using these Giant Blogging Platforms.


Before sharing my experience you need to know that,

Blogger is a free Platform provided by The Google and we also can add Custom domain to it for free, But it is not owned by us thus, Google has fully rights to shut down the Blog even without noticing.

Wordpress has two version, Self-Hosted and Hosted version. Self hosted version means you owns your blog whereas, Hosted means blogs own by the Wordpress.

Here are the Few things that i have noticed between Wordpress and Blogger.

1. Monetization:- 

When it comes to the Blogging, Monetization is the important part to make your blog as an earning source. In Blogger it is easy to get approved in Adsense than Wordpress, Because Blogger is integrated with Adsense, I mean not to say that, Wordpress blog get disapproved.

2. Appearance:-

Blogger has very few number of templates, we can set color, layout by using its built-in tools. There are also non-official blogger template but those templates are usually low quality.

There are large number of Free and Premium Wordpress themes available, Which makes professional looking websites and themes available for Wordpress are usually high quality.

3. Security:-

Blogger is owned by Google, That means it is robust and secure platform, you also do not need to worry about the servers

Wordpress is also secure but it totally depends on you, that means you have to have responsibility for security and backups. You also have to worry about the servers where the content you have hosted.

4. Portability and SEO:- 

In Blogger, moving your sites to another platform is little bit complicated and you may also loose your subscriber, SEO.

Using WordPress, you can move your site anywhere you want. You can move your WordPress site to a new host, change domain name, or even move your site to other content management systems.
Also if you compare WordPress vs Blogger SEO, then WordPress offers way more SEO advantages.

I hope, this post helped you to understand little bit about Blogger and Wordpress
Read More »

Tuesday, March 17, 2015

Blogger or Wordpress - Which One Should i Use?

You are here, That means you are definitely a blogger, Then you probably may be familiar with these two words: Blogger and Wordpress. Both Are the Top and established Blogging platform. And you probably may be here because you are confused to choose the blogging platform between Blogger and Wordpress.

Today I am here to Share my experience of Using both Wordpress and Blogger and comparison between them as per my experience.

I started my blogging career with Blogger So As of Now, I am too much familiar with Blogger Blogging Platform, And it is also almost a year of using Wordpress Platform for publishing my contents. So here is my Experience of Using these Giant Blogging Platforms.

Before sharing my experience you need to know that,

Blogger is a free Platform provided by The Google and we also can add Custom domain to it for free, But it is not owned by us thus, Google has fully rights to shut down the Blog even without noticing.

Wordpress has two version, Self-Hosted and Hosted version. Self hosted version means you owns your blog whereas, Hosted means blogs own by the Wordpress.

Here are the Few things that i have noticed between Wordpress and Blogger.

1. Monetization:- When it comes to the Blogging, Monetization is the important part to make your blog as an earning source. In Blogger it is easy to get approved in Adsense than Wordpress, Because Blogger is integrated with Adsense, I mean not to say that, Wordpress blog get disapproved.
Read More »

Tuesday, March 10, 2015

Exchange Blog Links for Better SEO

Yeah, You may have already heard about Link Exchanging Lets Exchange the Blog Links.

Hey guys, If you want to exchange link with this blog then First you have to put below code into your blog or put startingphaseofc.blogspot.com anywhere inside of your blog.
<a href="http://startingphaseofc.blogspot.com" target="_blank"> A Complete Blog Solution</a>
After you have put above code in your blog, then comment below at comment box with your blog link and where you put the Link then your blog links will be added to this blog within 7-8 hours.


Linked Blogs

Sn Blog Name with Link Author
 1     Free Blogging Tips and Tricks   Nischal Khanal
 2     AllDigiTricks   Krishna Y
 3     Complete PC Solutions   Bishal Bhandari
 4
 5     AskMeByte.com   Binaya Gurung
 6     Info Blogger   Ibnu Mubarok
 7     Adhikari Networks   Sugam Adhikari
 8     The University of Web  Zravo Weboo
 9     Tech Geek Tricks   Bishal Bhandari
Read More »

Sunday, February 22, 2015

How to Boost your site SEO with videos

Most of the Blogger wants boost their SEO (search engine Optimization) their blog or site. But they actually didn't think that what makes a reader or audiences interesting and to make them to stay long. But today i am going to tell, how can a blogger can boost their sites with related videos?

Most of the audiences enjoys watching videos instead of reading every single word written in an article. if you can post related videos, They feel interested knowing something by watching related videos with content, which makes your audiences to stay or spend long period on your blog. Not more things need to explain below picture says everything.


Read More »

Wednesday, February 4, 2015

How to Change the Permalink On Blogger Post?

What is a Permalink?
Permalink, A short form of Permanent Link is a URL which points to specific Web Page.

Why Should I change the Permalink on Blogger?
Permalink (URL of a Web Page) is taken as very important factor on Search Engine Optimization (SEO) Fields. In the Earlier Days of Blogger, It didn't have such feature to change Permalink (or Customize URL) manually, which the Permalink of a Post used to be generated automatically. In some cases Like, Longer Post Titles Permalink would be broken which can be unfriendly to the Search Engines. But now Google Blogger had overcome with this limit that means now we can Customize the Blogger Post Link easily with our own URL Structure.


Okay, Now  I Understand what it is But How to Change It on Blogger?

Step 1. First Login to your Blogger Dashboard .
Step 2. Now Create a New Post and Write your Required Articles, you can see  Post settings  on your Right Side of the Blogger.
Step 3. Now Click on Permalink then choose Custom Permalink.
Step 4. Now Write your Own Custom URL Structure and Click on Done.
Step 5. Now Publish The Post.


Now you are done, You have successfully Customized the Permalink of your Blogger Post.

Note:
While Writing a Custom Permalink, White Space ( ) should be replaced by dash (-).
Read More »

Thursday, January 22, 2015

How to put Adsense code in the Middle of the post on Blogger?

Google Adsense is one and only high earning source for Bloggers. It is a based on CPC (Cost Per Click) which means you only get a money when the users click the ads provided by Google Adsense.

First of all you have to have a enough visitors to get enough money, but what happens when there is less numbers of visitors with no clicks to ads then we begin to customize the template and put more ads on a single blog but what happens at last you may be forwarded to disability of your adsense account.

Today I am here to share a useful tip for not Only adsense user but others also. This tip is about to put an adsense code to the middle of the post which also helps to increase the CTR of your adsense earning.

But how to do? here is the solution.

Step 1. Login to your Blogger Dashboard.

Step 2. Go to Layout >> Edit HTML and Proceed.

Step 3. Now click anywhere of the HTML editor and search for this <data:post.body/> . You may find this code several times but stop at second one.

Step 4. Now replace <data:post.body/> with below code.

<div expr:id='&quot;aim1&quot; + data:post.id'/>
<div style='clear:both; margin:10px 0'>
Your Adsense Code Here
</div>
<div expr:id='&quot;aim2&quot; + data:post.id'>
<data:post.body/>
</div>
<script type='text/javascript'>
var obj0=document.getElementById(&quot;aim1<data:post.id/>&quot;);var obj1=document.getElementById(&quot;aim2<data:post.id/>&quot;);var s=obj1.innerHTML;var t=s.substr(0,s.length/2);var r=t.lastIndexOf(&quot;&quot;);if(r&gt;0){obj0.innerHTML=s.substr(0,r);obj1.innerHTML=s.substr(r+1)}
</script>

Step 5. Save your template then you are done.

Note:-
  • You have to first convert your adsense code into compatible form from here.
  • Replace Your Adsense Code Here with your own adsense converted code.


Read More »

Sunday, January 18, 2015

How to remove a Gap or Space Between Post Body and Sidebar on Blogger ?

If we are new to Blogger, we may use the Built-in Blogger template, which are quite good and suits to every blogs and are very neat and clean. But sometimes we may want to customize the template for even more nice look.

While customizing the template, some of us may not like the space or Gap between the Post Body and Sidebar. and searches how to remove (or reduce or decrease) that gap between the post body and Sidebar?

Here is the solution:

Step 1. Go to Template >> Edit HTML
Step 2. Search for the code ]]></b:skin>
Step 3. Place the below codes just above or before ]]></b:skin>

#sidebar-right-1{
position: relative;
left: -45px !important;
}

Step 4. Now save the template then you are done!

Note:- You can adjust the value -45px according to your spacing.
            It not only works on built in blogger template but also in Other templates.
Read More »

Saturday, January 10, 2015

How to change post font size, color, style on blogger post with css

You can customize post body font in any expect like font, size, color, font family. First, you should know little bit knowledge about html code for post body and then we'll customize it according to our own taste.

Step1: Go to Layout and Edit HTML and find this code

Step2: search for this code ]]></b:skin>

Step3: now paste below code just above ]]></b:skin>
.entry-content, .entry-more { font-family: georgia;  font-size: 15px;color: #000;}
Step4: Now it is done and save your template

Note:- Change above (size, family, color) with your choice.

Read More »

Saturday, December 27, 2014

How to add a responsive Recent Comment widget with avatars on blogger

Recent comments widget displays visitors the recent discussion on your website, More professional bloggers have added these kinds of recent comment widget on their blogs to make more professional, Today i am going to share the responsive or flexible or stylish recent comment widget to make your blogs more professional, Lets go through it.
recent comment
Step 1:- Go to Blogger Dashboard >> layout and click on 'Add a gadget' Link.

Step 2:- New pop up window will appear then scroll down the window and choose 'HTML/Javascript' optoin.

Step 3:- Now copy and paste the following code.

<div class='widget-content'>
<style type="text/css">
.rc{padding-left:24px; padding-top: 6px;}
.rc a:hover {color: #F3903E;text-decoration: none;}
.rc-ico{margin-left:-20px;margin-top:4px;float:left; margin-right:3px}
.rc-ico img {margin-top: -2px;margin-right:5px; border: 2px solid #fff;-webkit-border-radius: 100px;-moz-border-radius: 100px;border-radius: 100px;-webkit-box-shadow: 0 1px 2px rgba(0, 0, 0, .4);-moz-box-shadow: 0 1px 2px rgba(0, 0, 0, .4);box-shadow: 0 1px 2px rgba(0, 0, 0, .4);
-webkit-transition: all 1s ease-in-out;
-moz-transition: all 1s ease-in-out;
-o-transition: all 1s ease-in-out;
-ms-transition: all 1s ease-in-out; }
.rc-ico img:hover {-webkit-transform: rotate(360deg);
-moz-transform: rotate(360deg);
-o-transform: rotate(360deg);
-ms-transform: rotate(360deg);}
.rc-header{font-size: 13px;}
.rc-header a{}
.rc-body{font-style: italic; font-size:11px;padding: 0px 4px 1px 10px;border: 1px solid transparent;}
.rc-footer{font-size:11px; float: right;}
#rcw-cr {font-family: Arial,Tahoma;font-size:9px;padding-top:7px;display:block;}
</style>
<script type="text/javascript">
var numRecentComments = 5;
var maxCommentChars = 67;
var trueAvatars = true;
var urlMyAvatar = '';
var urlMyProfile = 'false';
var cropAvatar = true;
var sizeAvatar = 50;
var urlNoAvatar = "https://blogger.googleusercontent.com/img/b/R29vZ2xl/AVvXsEh5kBAKq-gJ5f0P0eJTCP3naUTGwGUHbzyRb3yOVQcqHorKX-EDZ3qcAI_7RPNs553pMSNk4n9qCkQDGpg-pRObjtfkqrrzwaMfInHtnGV9UntRQxPdB3Qn89X22mzFhiKkfh4sR5i78S1f/"+sizeAvatar+"/anonymous-Icon.jpg";
var urlAnoAvatar = 'http://www.gravatar.com/avatar/00000000000000000000000000000000?d=mm&s=' + sizeAvatar;
var txtMore = '';
var txtWrote = 'commented:';
var txtAnonymous = '';
var maxResultsComments = "";
var numPerPost = 2;
var maxPostTitleChars = 40;
var getTitles = true;
var maxResultsPosts = "";
var txtTooltip = '[user] on &quot;[title]&quot; - [date MM-dd-yyyy hh:mm]';
var urlToTitle = {};
function replaceVars(text, user, title, date) {
text = text.replace('[user]', user);
text = text.replace('[date]', date.toLocaleDateString());
text = text.replace('[datetime]', date.toLocaleString());
text = text.replace('[time]', date.toLocaleTimeString());
text = text.replace('[title]', title.replace(/\"/g,'&quot;'));
var i = text.indexOf("[date ");
if(i > -1) {
var format = /\[date\s+(.+?)\]/.exec(text)[1];
if(format != '') {
var txtDate = format.replace(/yyyy/i, date.getFullYear());
txtDate = txtDate.replace(/yy/i, date.getFullYear().toString().slice(-2));
txtDate = txtDate.replace("MM", String("0"+(date.getMonth()+1)).slice(-2));
txtDate = txtDate.replace("mm", String("0"+date.getMinutes()).slice(-2));
txtDate = txtDate.replace("ss", String("0"+date.getSeconds()).slice(-2));
txtDate = txtDate.replace("dd", String("0"+date.getDate()).slice(-2));
//or: txtDate = txtDate.replace("dd", date.getDate());
txtDate = txtDate.replace("hh", String("0"+date.getHours()).slice(-2));
//or: txtDate = txtDate.replace("hh", date.getHours());
text = text.replace(/\[date\s+(.+?)\]/, txtDate)
}
}
return text;
}
if(urlMyProfile == "") {
var elements = document.getElementsByTagName("*");
var expr = /(^| )profile-link( |$)/;
for(var i=0 ; i<elements.length ; i++)
if(expr.test(elements[i].className)) {
urlMyProfile = elements[i].href;
break;
}
}
function getPostUrlsForComments(json) {
for(var i = 0 ; i < json.feed.entry.length ; i++ ) {
var entry = json.feed.entry[i];
for (var k = 0; k < entry.link.length; k++ ) {
if (entry.link[k].rel == 'alternate') {
href = entry.link[k].href;
break;
}
}
urlToTitle[href] = entry.title.$t;
}
}
function showRecentComments(json) {
var postHandled = {};
var j = 0;
if(numPerPost) {
while(numPerPost < numRecentComments) {
for(var i = 0 ; i < json.feed.entry.length ; i++ ) {
var entry = json.feed.entry[i]; if(entry.author[0].name.$t=="Blogger User") continue;
if(entry["thr$in-reply-to"]) {
if(!postHandled[entry["thr$in-reply-to"].href])
postHandled[entry["thr$in-reply-to"].href] = 1;
else
postHandled[entry["thr$in-reply-to"].href]++;
if(postHandled[entry["thr$in-reply-to"].href] <= numPerPost)
j++;
}
}
if(j >= numRecentComments)
break;
numPerPost++;
j = 0;
postHandled = {};
}
if(numRecentComments == numPerPost)
numPerPost = 0;
}
postHandled = {};
j = 0;
for(var i = 0 ; j < numRecentComments && i < json.feed.entry.length ; i++ ) {
var entry = json.feed.entry[i]; if(entry.author[0].name.$t=="Blogger User") continue;
if(numPerPost && postHandled[entry["thr$in-reply-to"].href] && postHandled[entry["thr$in-reply-to"].href] >= numPerPost)
continue;
if(entry["thr$in-reply-to"]) {
if(!postHandled[entry["thr$in-reply-to"].href])
postHandled[entry["thr$in-reply-to"].href] = 1;
else
postHandled[entry["thr$in-reply-to"].href]++;
j++;
var href='';
for (var k = 0; k < entry.link.length; k++ ) {
if (entry.link[k].rel == 'alternate') {
href = entry.link[k].href;
break;
}
}
if(href=='') {j--; continue; }
var hrefPost = href.split("?")[0];
var comment = "";
if("content" in entry) comment = entry.content.$t;
else comment = entry.summary.$t;
comment = comment.replace(/<br[^>]*>/ig, " ");
comment = comment.replace(/<\S[^>]*>/g, "");
var postTitle="-";
if(urlToTitle[hrefPost]) postTitle=urlToTitle[hrefPost];
else {
if(hrefPost.match(/\/([^/]*)\.html/)) postTitle = hrefPost.match(/\/([^/]*)\.html/)[1].replace(/_\d{2}$/, "");
postTitle = postTitle.replace(/-/g," ");
postTitle = postTitle[0].toUpperCase() + postTitle.slice(1);
}
if(maxPostTitleChars && postTitle.length > maxPostTitleChars) {
postTitle = postTitle.substring(0, maxPostTitleChars);
var indexBreak = postTitle.lastIndexOf(" ");
postTitle = postTitle.substring(0, indexBreak) + "...";
}
var authorName = entry.author[0].name.$t;
var authorUri = "";
if(entry.author[0].uri && entry.author[0].uri.$t != "")
authorUri = entry.author[0].uri.$t;
var avaimg = urlAnoAvatar;
var bloggerprofile = "http://www.blogger.com/profile/";
if(trueAvatars && entry.author[0].gd$image && entry.author[0].gd$image.src && authorUri.substr(0,bloggerprofile.length) == bloggerprofile)
avaimg = entry.author[0].gd$image.src;
else {
var parseurl = document.createElement('a');
if(authorUri != "") {
parseurl.href = authorUri;
avaimg = 'http://www.google.com/s2/favicons?domain=' + parseurl.hostname;
}
}
if(urlMyProfile != "" && authorUri == urlMyProfile && urlMyAvatar != "")
avaimg = urlMyAvatar;
if(avaimg == "http://img2.blogblog.com/img/b16-rounded.gif" && urlNoAvatar != "")
avaimg = urlNoAvatar;
var newsize="s"+sizeAvatar;
avaimg = avaimg.replace(/\/s\d\d+-c\//, "/"+newsize+"-c/");
if(cropAvatar) newsize+="-c";
avaimg = avaimg.replace(/\/s\d\d+(-c){0,1}\//, "/"+newsize+"/");
if(authorName == 'Anonymous' && txtAnonymous != '' && avaimg == urlAnoAvatar)
authorName = txtAnonymous;
var imgcode = '<img height="'+sizeAvatar+'" width="'+sizeAvatar+'" title="'+authorName+'" src="'+avaimg+'" />';
if (authorUri!="") imgcode = '<a href="'+authorUri+'">'+imgcode+'</a>';
var clsAdmin = "";
if(urlMyProfile != "" && authorUri == urlMyProfile)
clsAdmin = " rc-admin";
var datePart = entry.published.$t.match(/\d+/g); // assume ISO 8601
var cmtDate = new Date(datePart[0],datePart[1]-1,datePart[2],datePart[3],datePart[4],datePart[5]);
var txtHeader = txtWrote;
if(txtWrote.indexOf('[')==-1)
txtHeader = authorName + ' ' + txtWrote;
else
txtHeader = replaceVars(txtHeader, authorName, postTitle, cmtDate);
var tooltip = replaceVars(txtTooltip, authorName, postTitle, cmtDate);
if(!/#/.test(href)) href += "#comments";
document.write('<div title="'+tooltip+'" class="rc'+clsAdmin+'">');
document.write('<div title="'+tooltip+'" class="rc-header'+clsAdmin+'"><div title="'+tooltip+'" class="rc-ico'+clsAdmin+'">'+imgcode+'</div><a title="'+tooltip+'" href="' + href + '">' + txtHeader + ' </a></div>');
if(comment.length < maxCommentChars)
document.write('<div title="'+tooltip+'" class="rc-body'+clsAdmin+'">' + comment + '</div>');
else {
comment = comment.substring(0, maxCommentChars);
var indexBreak = comment.lastIndexOf(" ");
comment = comment.substring(0, indexBreak);
document.write('<div title="'+tooltip+'" class="rc-body'+clsAdmin+'">' + comment + '...</div>');
if(txtMore != "") {
var moretext = replaceVars(txtMore, authorName, postTitle, cmtDate);
document.write('<div title="'+tooltip+'" class="rc-footer'+clsAdmin+'"><a title="'+tooltip+'" href="' + href + '">' + moretext + '</a></div>');
}
}
document.write('<div style="clear:both;"></div></div>');
}
}
}
if(getTitles)
document.write('<script type="text/javascript" src="http://'+window.location.hostname+'/feeds/posts/summary?redirect=false'+maxResultsPosts+'&alt=json-in-script&callback=getPostUrlsForComments"></'+'script>');
document.write('<script type="text/javascript" src="http://'+window.location.hostname+'/feeds/comments/default?redirect=false'+maxResultsComments+'&alt=json-in-script&callback=showRecentComments"></'+'script>');
</script></div>

Step 4:- Now lets customize it.

- Change 5 from var numRecentComments = 5; in above code that you want to show number of comments on your blog.

Step 5:- Now save the Gadget and enjoy !


Read More »

Thursday, December 25, 2014

Simple Recent Post Widget for Blogger without Thumbnail and Post Title only

Simple Recent Post Widget for Blogger without Thumbnail and Post Title only

Blogger blogging Platform actually does have a built-in Feature to show recent posts But lets do with manually adding HTML/JAVAScript Recent post widget to your blogger blog, but how?

Here is the Solution:
Recent Post Widget

Step 1:- Login to you Blogger Dashboard
Step 2:- Go to Layout and Add Gadget link anywhere you want to show recent post.
Step 3:- Now new pop up window will appear and scroll down then copy and paste below code.

 <div id="hlrpsb">
<script style="text/javascript" src="http://helplogger.googlecode.com/svn/trunk/recent-posts-with-titles-only.js"></script>
<script style="text/javascript">var numposts = 10;var showpostdate = false;var showpostsummary = false;var numchars = 100;var standardstyling = true;</script>
<script src="http://blog-address.com/feeds/posts/default?orderby=published&alt=json-in-script&callback=showrecentposts"></script></div><a style="font-size: 9px; color: #CECECE; float: right; margin: 5px;" href="http://startingphaseofc.blogspot.com/2014/12/simple-recent-post-widget-for-blogger.html" rel="nofollow" >Recent Posts Widget</a>
<noscript>Oops! Make sure JavaScript is enabled in your browser.</noscript>
<style type=text/css>
#hlrpsb a {color: #0B3861; font-size: 13px;}
#rpdr, #rpdr a {color:#808080;}
.bbrecpost2 {
padding-top:6px;
padding-bottom:6px;
border-bottom: 1px #cccccc dotted; }
</style>

 Step 4:- Customize the script.

- Change http://blog-address.com with you blog address.
- Change 10 to desired number of posts you want to display.

Step 5:- Now Save the Widget and Enjoy !

Read More »

Saturday, November 15, 2014

How to Add a Stylish Download Button Link on Blogger and Website ?

As we all know that, Blogger is the well known and mostly used blogging platform among all the Blogging platform. Nowadays We can see the all popular Blogger blog is customized with responsively, so that visitors can be easily attracted to the sites.
Stylish Button Link also is the most important to make blog responsive.
Here I am providing most attractive CSS button links for your website or a blogger blog. If you provide free stuff to download, you can use these button links in your blogger blog or website.

How to add Stylish Download Button Links

1. Login to your Blogger Dashboard
2. Go to Template Section
3. Click on Backup/Restore (Always backup your template before making any changes)
4. Now Edit Html and click anywhere at HTML section and press Ctrl+f to find,

]]></b:skin>
5. Now just before or above the ]]></b:skin> Paste the Below code.

/***FIRST STYLE THE BUTTON***/
input#bigbutton {
width:500px;
background: #3e9cbf; /*the colour of the button*/
padding: 8px 14px 10px; /*apply some padding inside the button*/
border:1px solid #3e9cbf; /*required or the default border for the browser will appear*/
cursor:pointer; /*forces the cursor to change to a hand when the button is hovered*/
/*style the text*/
font-size:1.5em;
font-family:Oswald, sans-serif; /*Oswald is available from http://www.google.com/webfonts/specimen/Oswald*/
letter-spacing:.1em;
text-shadow: 0 -1px 0px rgba(0, 0, 0, 0.3); /*give the text a shadow - doesn't appear in Opera 12.02 or earlier*/
color: #fff;
/*use box-shadow to give the button some depth - see cssdemos.tupence.co.uk/box-shadow.htm#demo7 for more info on this technique*/
-webkit-box-shadow: inset 0px 1px 0px #3e9cbf, 0px 5px 0px 0px #205c73, 0px 10px 5px #999;
-moz-box-shadow: inset 0px 1px 0px #3e9cbf, 0px 5px 0px 0px #205c73, 0px 10px 5px #999;
box-shadow: inset 0px 1px 0px #3e9cbf, 0px 5px 0px 0px #205c73, 0px 10px 5px #999;
/*give the corners a small curve*/
-moz-border-radius: 10px;
-webkit-border-radius: 10px;
border-radius: 10px;
}

6. Save the template.
7. Now Copy this code everytime where you want to put Stylish Button Link on your post and save or publish the post and check the post.
<a href="donwload-link" target="_blank"><input id="gobutton" type="submit" value="Download" /></a>


Now you are done.

Note:-

  • Change download-link with your original download link.
Read More »

Friday, October 3, 2014

How to stop Blogger Blog from redirecting to country-specific URLs

Blogger and Country-Specific Domains

My traffic logs suggest that country-specific redirection in Blogger is now live in at least 15 countries. Here’s a complete list:

India [blogspot.in], Australia [blogspot.com.au], UK [blogspot.co.uk], Japan [blogspot.jp], New Zealand [blogspot.co.nz], Canada [blogspot.ca], Germany [blogspot.de], Italy [blogspot.it], France [blogspot.fr], Sweden [blogspot.se], Spain [blogspot.com.es], Portugal [blogspot.pt], Brazil [blogspot.com.br], Argentina [blogspot.com.ar], Mexico [blogspot.mx]

This country-specific URLs make a negative impression to the site linking and Ranking of a site.

How to Stop Blogger from Redirecting to Country-Specific Domains ?

1. First Go to Blogger Dashboard >> Template  >> Edit HTML

2. Now Search for the <head> tag using Ctrl+f.

3. Now copy the below code just after <head> tag.

<script type="text/javascript">
var blog = document.location.hostname.split(".");
if (blog[blog.length - 1] != "com") {
var ncr = "http://" + blog[0] + ".blogspot.com/ncr";
window.location.replace(ncr + document.location.pathname);
}
</script>


4. Now save the template and you are done.

Read More »

Wednesday, October 1, 2014

How to redirect Blogger 404 Error Page (Page Not Found) to Homepage

Most of the Bloggers starts their blog from Blogger Platform and starts posting number of articles.

Sometime, you may have changed the URL, then indexed URL on search engines forward visitors to the old URL, this automatically redirects to the 404 page.

Sometime, it may also happen when the visitors misspelled the URL.

When you have a popular blog this make negative impression to the blogs because of not clicking back and homepage button and leaves the site forever. Now we have to redirect 404 Error page to Homepage and this will make the good impression and greatest potential  users of our blog.


How to redirect 404 Error page to Homepage?

Step 1:- First Go to Blogger Dashboard >> Setting >> Search Preference >> Custom Page Not Found.


Step 2:- Now copy the below code to the Empty Box.

Sorry, the page you're looking for in this blog does not exist.
You will be redirected to homepage shortly.
<script type = "text/javascript">
BSPNF_redirect = setTimeout(function() {
location.pathname= "/"
}, 7000);
</script>
now click on save changes.

Note:-

In my case, I have used 7000, which means you will be redirected to Homepage in 7 seconds.

Read More »

Tuesday, September 30, 2014

How to automatically Redirect Blogger Blog(blogspot) to another blog or Domain


We may have created lots of blog and some of them are now popular with good traffics, Now we want to merge both blogspot sites to get double traffics from both blogs, at that time we have to take a 302 Redirection.

When this to use:-


  • This will be useful when you have added the custom domain with new platform like Wordpress.

  • This will be very useful when you have the broken links and 404 pages.

  • This will be useful when you have many popular blogs with good traffics, now you want to migrate all of those blog.
There are 2 kinds of 302 Redirection,  Redirection of Specific Pages, Redirection of Whole Blog, and Redirection in a specific time.

How to redirect automatically blog or blog's pages to another blog or domain?

Go to Blogger Dashboard >> Template >> Edit HTML.
Now search ( Ctrl+f) for </head> tag.

If you want to redirect whole blog copy the below code just above the </head> tag.


1
<script type='text/javascript'>
2
  var d='<data:blog.url/>';

3
  d=d.replace(/.*\/\/[^\/]*/, '');
4
  location.href = 'http://startingphaseofc.blogspot.com';

5
</script>

change http://startingphaseofc.blogspot.com  with your own URL, Then save the template and you are done.

If you want to redirect Specific Page copy the below code just above </head> tag.

1
<script>

2
if(window.location.href == 'http://yourblog.blogspot.com/pages')

3
{

4
window.location="http://startingphaseofc.blogspot.com";

5
}

6
</script>

Remember, Change http://yourblog.blogspot.com/pages with your source URL and http://startingphaseofc.blogspot.com with your Destination URL. then save the template and you are done.

If you want to redirect your blog to another blog or domain in specific time, copy the below code just above the </head> tag.

1
<meta content='5;url=http://startingphaseofc.blogspot.com' http-equiv='refresh'/>

Now remember  http://startingphaseofc.blogspot.com with your Destination URL then save the tempalte and you are done.

If you find this article helpful, Please Response............

Read More »

Sunday, August 24, 2014

Flat Mag Responsive Blogger Template


LIVE DEMO           DOWNLOAD

Flat Mag Responsive Blogger Template is a multi-purpose straight Blogger template precisely designed for multimedia, news bulletin, Entertainment and Technology blogs. With elegant green color scheme, Fla tMag gives you visitors the experience of their life as they go though the responsive and flexible design. It has a lot of useful and key widgets, which come which are ready-to-use from the time this template is installed on your blog. Following are the few key features we have incorporated in this responsive blogger theme.


  • Responsive Design:It has responsive design which automatically fits different resolutions i.e. iPad, iPod, Android and etc. (Try resizing the page of your browser and see the magic). This theme is coded so perfectly that it is highly responsive in even Internet Explorer.
  • Breadcrumbs: The most amazing widget we have in this template is Breadcrumbs for humans. It has nothing to do with SEO. The breadcrumbs would only display parent categories of the article so users can easily search your site in depth.
  • Sticky Header with Drop down Menu: In this theme, we have used “Sticky” drop down menu, but a lot of users demanded for a Multi Drop Down menu which could work on three different sub levels. Keeping that in mind, we have added a “Sticky”, Multi-level Drop down menu in this theme. On the top of that the header of this theme is also sticky.
  • Author Bio Widget: The next new thing, which we have added in the template, is the “Author Bio” widget that appears in each and every post. Anyone can customize it, according to their needs. Keep in mind it is not for multiple authors.
  • Featured Label Posts: Just like our previous themes, we have also added a featured post display in this theme, which gives a user the flexibility to easily display posts through a certain Label on home and archive pages. To learn how to install this feature, kindly check the guidance below.
  • More Features: Back to Top button, 4 columns Footer, 3 columns Template, Threaded commenting system, related posts, Ads ready, SEO Friendly and much more.


  • Read More »

    Saturday, August 23, 2014

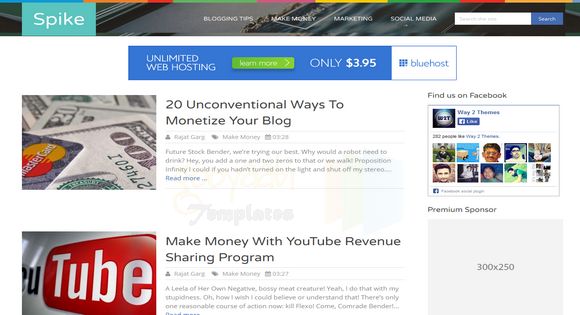
    Spike Responsive Blogger template


                                    LIVE DEMO                                                           DOWNLOAD


     Template Features:
    Blogger, Email Subscription Widget Ready, Unique, Seo Ready, Black, 4 Columns Footer, Responsive, Magazine, Page Navigation Menu, Gray, Clean, Simple, White, Ads Ready, Post Thumbnails, Drop down Menu, 1 Right Sidebar, 2 Columns, 1 Sidebar, Right Sidebar.
    Read More »

    Friday, August 22, 2014

    Rocket blogger template

    Rocket Template

    • Template Name :- Rocket Blogger Template.
    • Author :- Sorat Templates.
    • Designer :-Kopasoft.
    • Release Date :- April 2013.
    • Features :- 3 Columns, Magazine, Featured Content Slider, Fixed Width, Dropdown Menu, Social Widget, Gray Background, Page Navigation Widget.
    It is little bit of modified version of Rocket Blogger template with sticky navbar.


    Configure Dropdown menu:-

    • Go to Blogger dashboard >> Template >> Edit HTML. Now scroll down following code and replace it with your links.

    <nav class='main-nav'>
     <span class='menu-icon'>Menu</span>
     <ul id='main-menu'>
       <li class='current-menu-item'><a href='/'>    Home</a></li>
     <li><a href='/search/label/Tricks'>Tricks</a>
     <ul>
     <li><a href='/search/label/Android'>Android</a></li>
     <li><a href='/search/label/Internet'>Internet</a></li>
     <li><a href='/search/label/Computer'>Windows</a></li>
     <li><a href='#'>Element page</a></li>
     <li><a href='#'>Typography page</a></li>
     <li><a href='#'>404 page</a></li>
     <li><a href='#'>Contact page</a></li>
     </ul>
     </li>
     <li><a href=''>Programming</a>
     <ul>
     <li><a href='/search/label/C'>C Coding</a></li>
     <li><a href='/search/label/C%20Plus%20Plus'>C++ Coding</a></li>
     <li><a href='#'>Visual Basic</a></li>
     <li><a href='#'>Element page</a></li>
     <li><a href='#'>Typography page</a></li>
     <li><a href='#'>404 page</a></li>
     <li><a href='#'>Contact page</a></li>
     </ul>
     </li>
     <li><a href='/search/label/blogging%20tips'>Blogging Tips</a></li>
     <li><a href='/search/label/NepaliBand'>Nepali Music</a></li>
     <li><a href='/search/label/Earn%20money'>Earning Tips</a></li>
     <li><a href='#'>Blogger Template</a></li>
       <li><a href='/p/about-me.html'>About</a></li>
     <li><a href='/p/contact-form-contact-us-to-contact-us.html'>Contact</a></li>
       <li><a href='/p/forum.html'>Discuss</a></li>
     </ul>
     <div class='divider-menu'><span/></div>
    </nav>
    <div class='clear'/>
    </div>
    </div>


    Read More »